1
Exterior / Symmetrical Mirrors
« on: March 28, 2016, 03:21:55 am »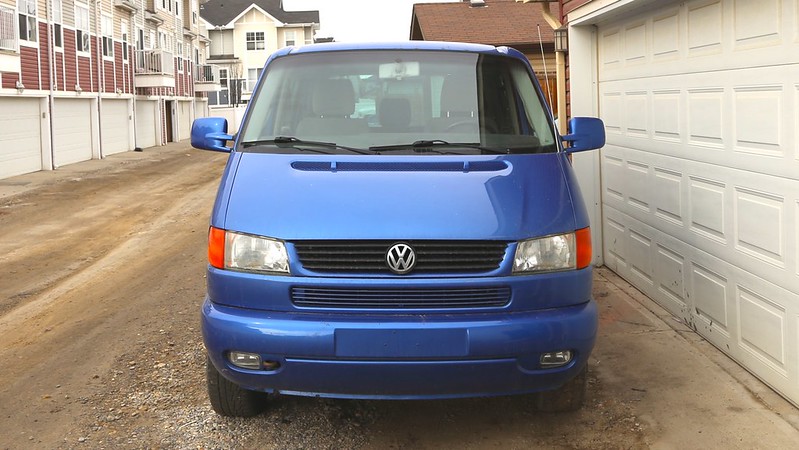
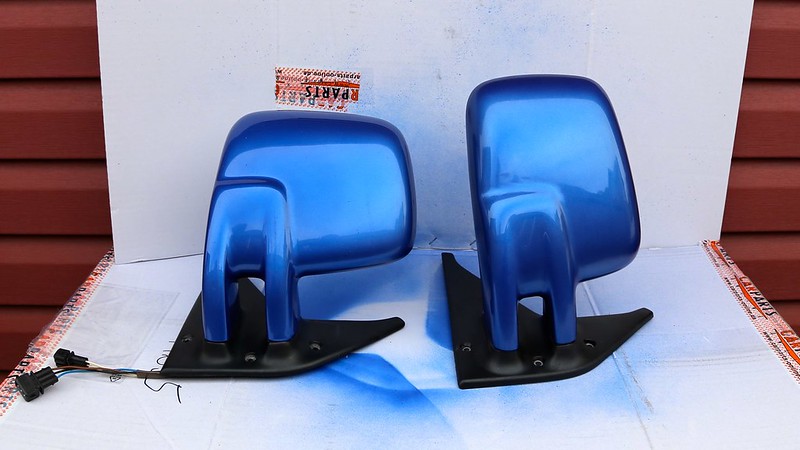
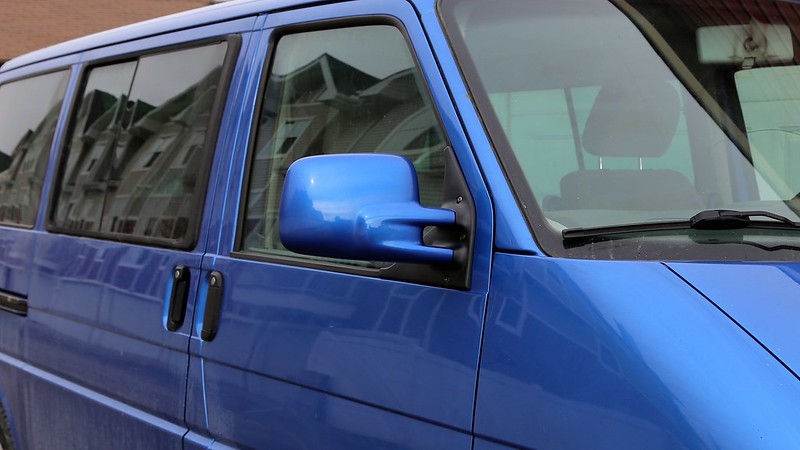
Can you tell what's different about this van?
The lack symmetry in the mirrors has always been a gripe that I have with the Eurovan. I'm sure at the time VW was doing these asymmetrical mirrors it was a time of "form follows function" - because they are ergonomically better for the driver. That being said, they still look "wonky" and unbalanced and to me an eyesore. And besides that, being that its the passenger mirror, I wasn't as worried about trading some visibility because I have some old driving habits (called shoulder checking) that some people have never heard of.

For a while, I'd been looking for a straight-up mirror trade with anyone from he UK - but had no takers. I inquired with a couple of parts dealers - but I think it was small potatoes so not a lot of callbacks on that. So eventually, I ordered myself 2 drivers side mirrors from the UK -- to get a full "low" mirror look. I wouldn't mind trying a full "high mirror" set on my other van that is lifted, as I think it might be a bit more "truck-like" -- but perhaps a bit more harder to be fitted with the correct mirror.
After looking at the steep prices for the heated/power mirrors -- I decided I could buy 2 manual mirrors (RHD drivers side) for less than half of what the full function mirror costs. I really don't care that much about the heated/defrost function -- but I wouldn't mind retaining power mirror option (still need to figure that one out).
Test Fitting
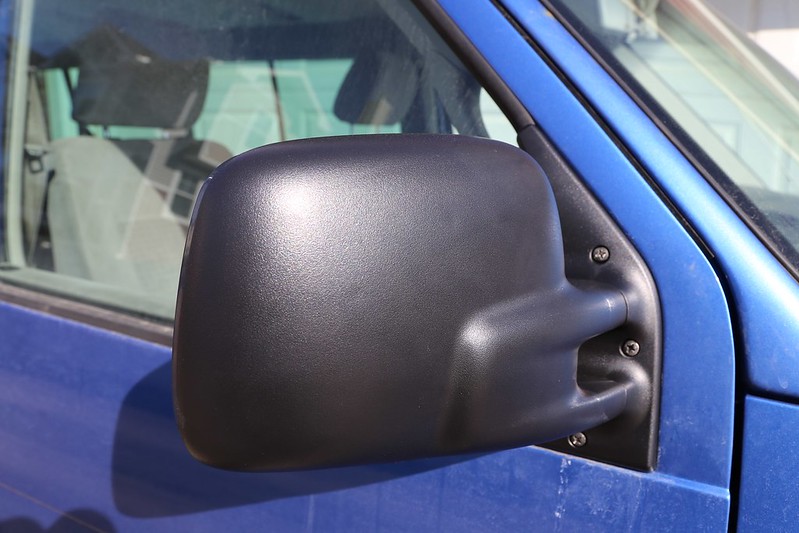
Removal of the old mirror is straight forward -- but the door card has to be removed to reach the wiring pigtails. Don't just undo the mirror and try and pull the wiring up and out as it will break the clips off inside the door.
You can see here that the replacement mirror that I got is textured -- where as the late model vans are smooth. Maybe because it was new, but the texture seems a little heavier that the black mirrors that I've seen on the early vans.
Mirror Glass
One of the things that goes against this sort of upgrade is retaining visibility out of the passenger side mirror -- which is normally convex. However, these mirrors are actually split between being planar with the outer portion aspheric (for better blind spot checking when used on the drivers side). I mounted them up and test drove with them for about a week with no issues once I got used to things not "being closer than they appear". Eventually I may try and find a heated convex mirror for this side and restore the defrost. I'm pretty certain it exists -- I just need to dig a bit for it.
Smoothing the Housing
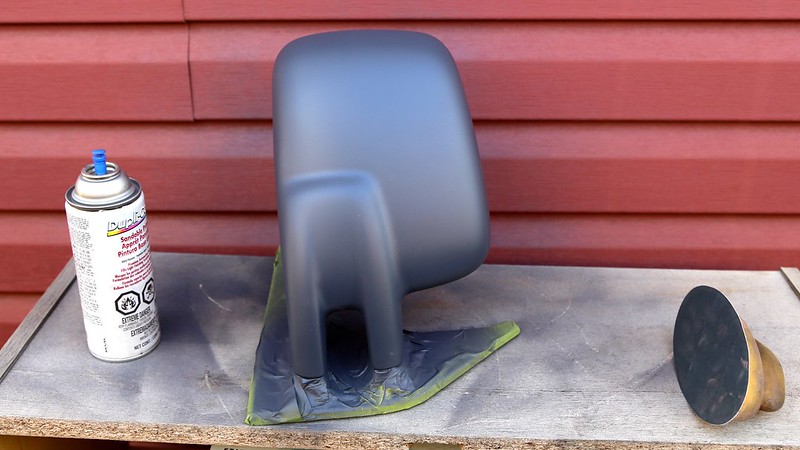
To get the texture of the mirror housing smooth - I first carefully removed the mirror, taped off the black trim and then just sanded down the housing starting with some 180 grit sand paper and worked it down to a 320/400 grit. Then I primed it to fill in the sanding marks, and sanded the primer with 600 grit.
Super Smooth!
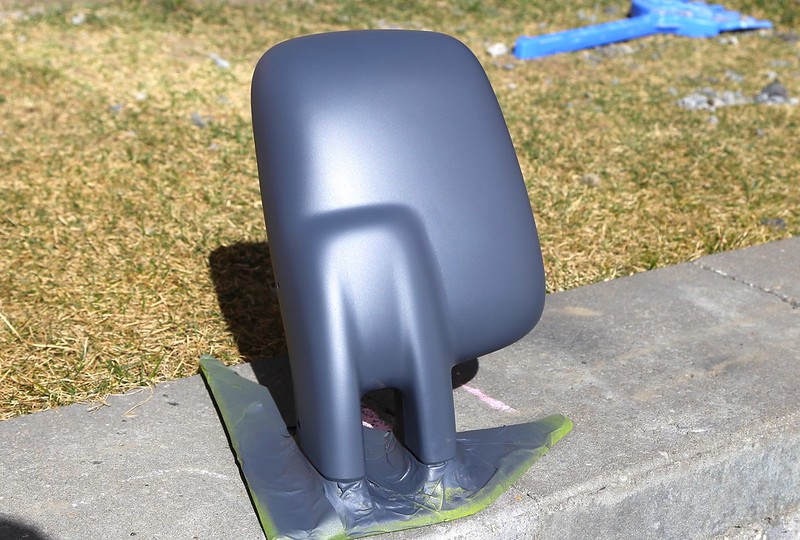
Then I got a spray can of colour-code matched paint made up at the local auto body paint supply store ($$$) and painted it slowly.
Painted Mirror Housing
L-R: Original housing, Replacement housing
And this picture (above) is actually a second paint job I did on the mirror. The first one, the clear coat spray can clogged up and basically barfed all over the housing. I screwed it up even more trying to fix it -- forcing me to sand it all the way back down and build up again. :banghead:
Mirror Motor Mount Pattern
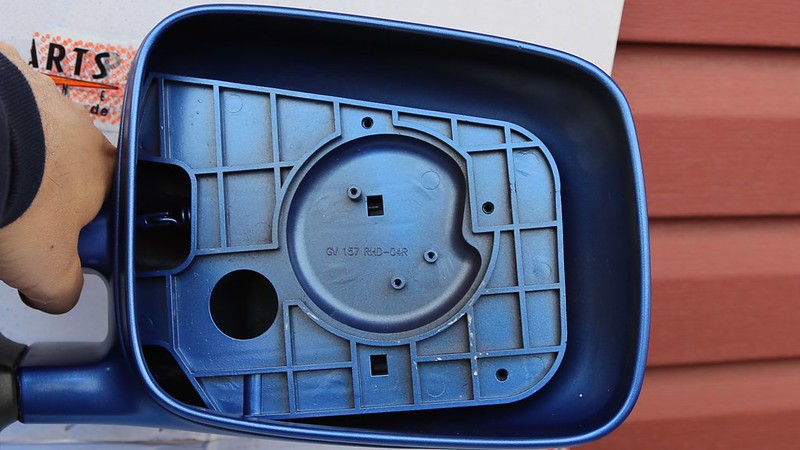
I was going to move over the power mirror motor and pigtail from the original mirror housing -- but it turned out that there is a slight difference in the mounting bolt pattern that made it not possible. The original motor is held to the housing with a 4 bolt pattern (I think this is an older motor design as its the same as what can be found in a Vanagon or older VW) -- while the new housing was prepped for a 3 bolt mount (which is the same as Mk3/4 golfs).
Mirror Motor and Pigtails
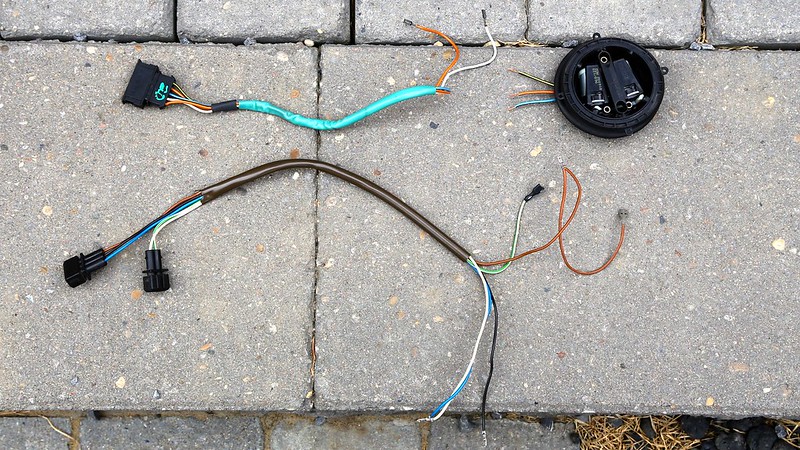
Top: MK3 Mirror Motor and Pigtail
Bottom: Eurovan Power Mirror Pigtail
So from the junkyard I went and sourced the motor and pigtail from a Mk3 golf (I had to cut the pigtail free as I was in a hurry) and the pigtail from a Eurovan to keep the connections inside the door intact. Both use a total of 5 wires -- 3 for the motor and 2 for the mirror heating element - so you figure it would be a straight ahead swap. There is a difference that has me stumped that I could use some pointers on -- while the wring of the Mk3's power mirror is straight ahead (2 wires to heating element, 3 to the motor) the Eurovan's wiring runs 4 wires to the motor (magnetic clutch?).
Mk3 Mirror Motor Pigtail
Pins 5-4 Heating Element, Pins 3-1 to Mirror Motor
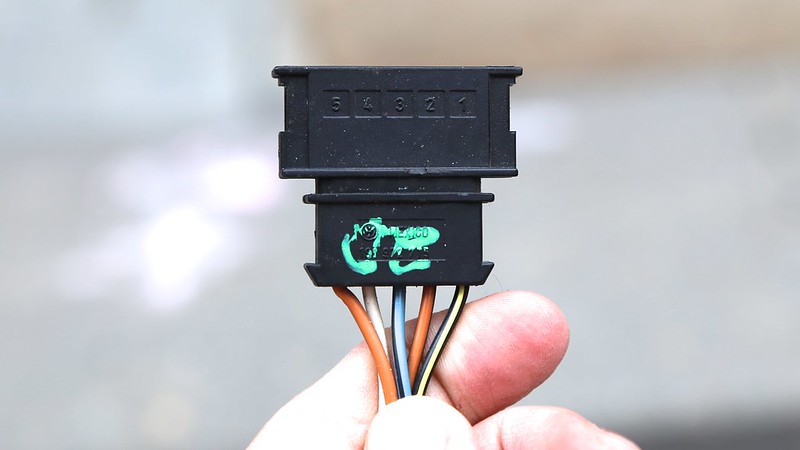
Eurovan Mirror Motor Pigtail

2-Wire Terminal: Pin1 Magnetic Clutch (back to other mirror), Pin 2 Heater Mirror Element
3-Wire Terminal: Pin 1 (Blue) Mirror Motor, Pin 2 (Black), Pin 3 (Brown) Ground.
I couldn't figure it out and have put off fully wiring the motor up until I get more information on how the MK3 mirror switch is wired. I have the Bentley for the Mk4 (same mirror motor), where it describes the mirror motor as being 2 motors, with the whole motor/heater element using 5 wires on a 12pin connector. Maybe I'm missing something (after all those paint fumes) -- perhaps the mirror selection switch plays a bigger role to all of this -- or there may be fundamental differences in the mirror-motors that make this more difficult. Anyhow -- I'm still happily running (with no defrost and no power adjustment) for now.
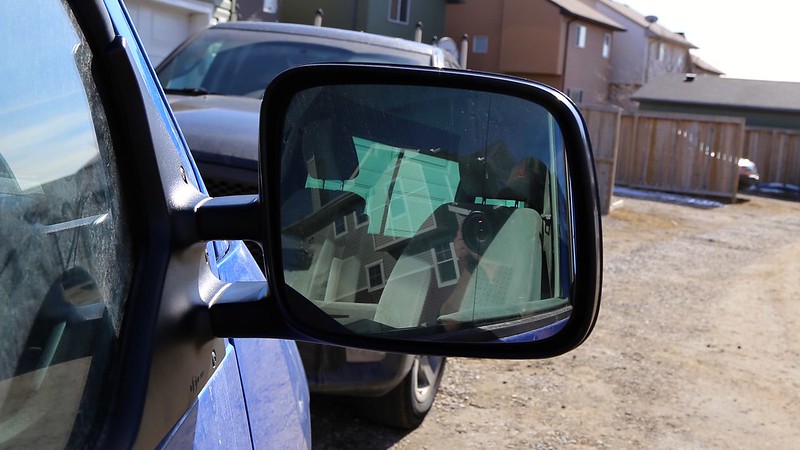
Mounted
View
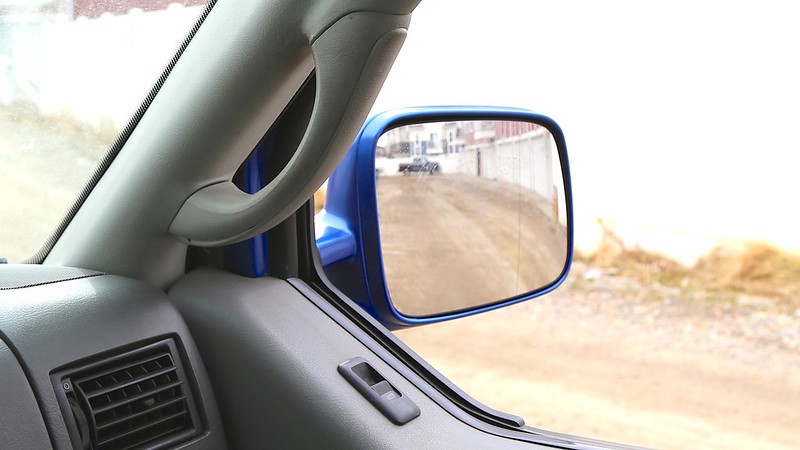
Symmetrical Mirrors