Blue Clock Clusters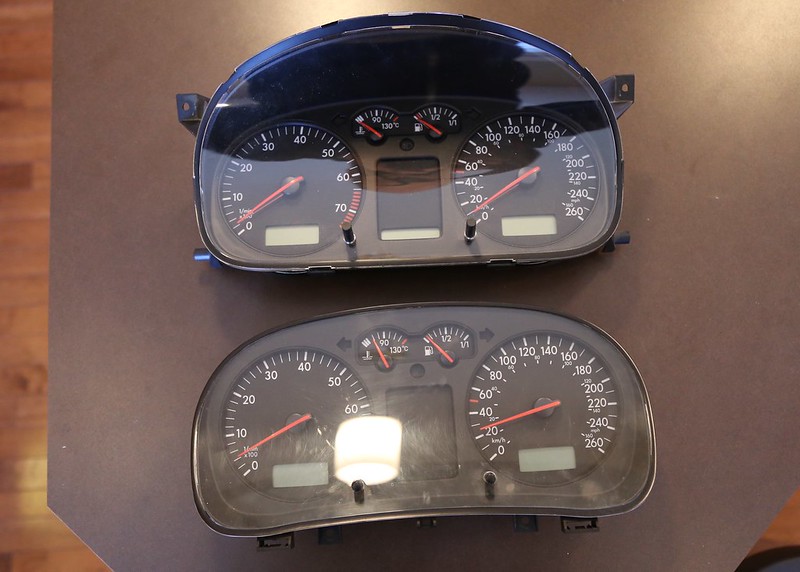 Top to Bottom: Automatic Eurovan Canadian-market, Manual Jetta Canadian-market -- different but the same.
Ok here is some interesting and new stuff regarding the Eurovan "blue clock" cluster. There really isn't much out there on this (as far as I can tell) - there is a thread from back in '04 where some guys were trying to swap an EV cluster into a Cabrio. Interestingly they noted how similar the late model EV was to the 3.5 Cabrio in terms of interior (switches etc) -- sort of caught between Mk3 and Mk4 style evolutions. Maybe this cluster swap info needs its own thread -- an interesting topic that could be fleshed out more. Its actually one of my favourite things about this generation of VW - the blue/red cluster. I've owned a couple of Mk4 Jettas and B5.5 Passat (with a MAF cluster) and now 2 vans -- so the blue cluster feels "right" to me, its second nature.
As Lucille is originally an American-market van, it's cluster face is predominantly imperial "miles" and here, I would prefer it to be in KM. It sort helps keep the speeding tickets down. :laugh: So shortly after I bought the van - I was collecting parts (rear bench headrests of course) for the van and the seller happened to have a Canadian-market van and had swapped the cluster out for an imperial cluster. So yay for me - metric cluster! I used the famous page from the UK T4 group as a basis for verifying what I was going to buy (Linkage:
http://www.vwt4forum.co.uk/showthread.php?t=86937).
So I've had that Canadian-EV cluster on the shelf for quite a while - and never got around to installing it. Then when I parted the 03 MK4 GLI -- I kept the cluster, key and ECU as I knew it was a mated set (for immobilizer 3). Well just on a hunch, I thought we should put these clusters side by side to see if there was more than just a resemblance and see if they were swappable. This works for me as I;m going to a manual setup, but the principle is the same for all the other late-model vans out there - because it means finding a metric or imperial cluster is that much easier, and now you can upgrade to trip computer and nav-integrated clusters as well (such as the MAF and FIS models). I'm not going to touch the material around immobilizer 2 and 3 -- or how to reprogram or delete the immobilizer here. I don't know it well enough -- and there are plenty of good writeups on it that have been generated by hyper-miling tdi fanatics. The trip computers here allow all that fancy mileage tracking, and fuel estimations to be made -- although this mod also requires a special stock-arm that allows the driver to interface with the computer. Worth exploring - this is a good upgrade - Link:
http://forums.tdiclub.com/showthread.php?t=48366So here is a quick swap using my two extra clusters to look at...
Looking at the cluster shape -- the plastic lens are at such dramatically different angles, and the overall shape seems so much different, different mounting tabs, etc -- that you would think these are two different animals. But if you look at them from behind, they use the same connections, and the cluster actually splits in half (front/back) and that's what makes the cluster swap possible.
BTW - these are both VDO made clusters, apparently there are also Bosch-made blue clusters (MAF and FIS models I suspect).Rear Harness Connection Top to Bottom: Eurovan Canadian-market, Jetta Canadian-marketCluster Case Clips
 Top to Bottom: Eurovan Canadian-market, Jetta Canadian-market
Lined up back to back -- there are 4 clips along the top, and then (not shown) there are 2 clips on the bottom and then 2 T10 screws on the side that hold/separate the front fascia half from the cluster electronics half.
Cluster Electronics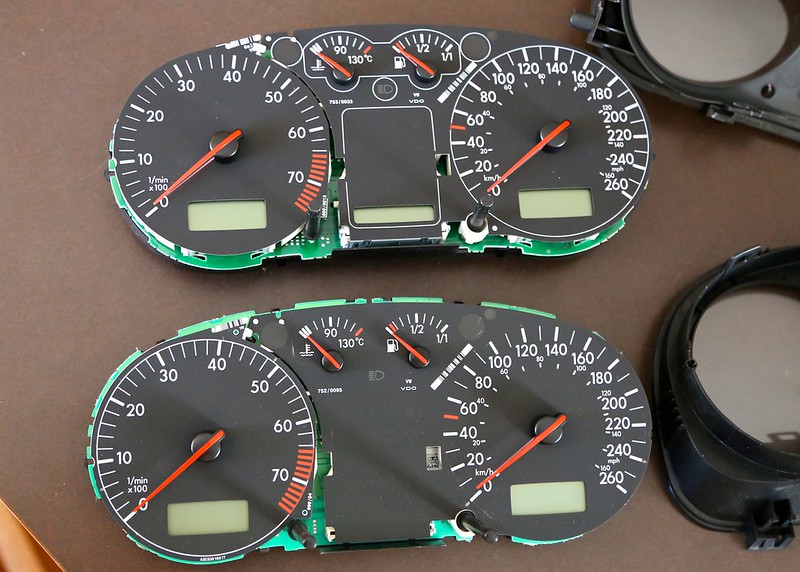 Top to Bottom: Eurovan Canadian-market, Jetta Canadian-market
So for me -- this swap basically gets me metric and drops the transmission selector display (it will also align my milage indicator with the motor). And if you didn't know this yet, but those cluster faces are removable - and there are bunches of after-market customizable clock faces available for the Mk4 platform.
Now there are some differences to these in terms of warning lights/locations - but I think the addressing is the same (so less of an issue). I used a flash light and peeled the face plates up enough to illuminate the panel.
Where the EV has this...
Eurovan EPC dash light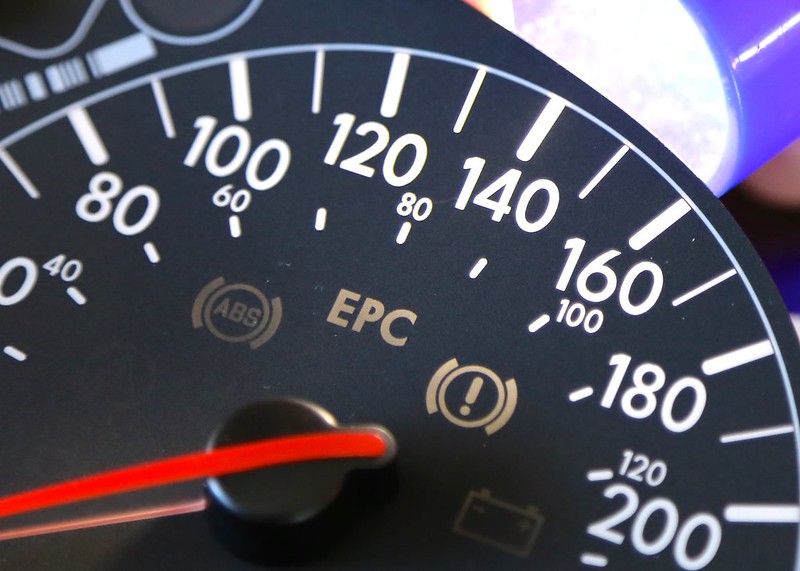
The MK4 has this...
Mk4 Immobilzer dash light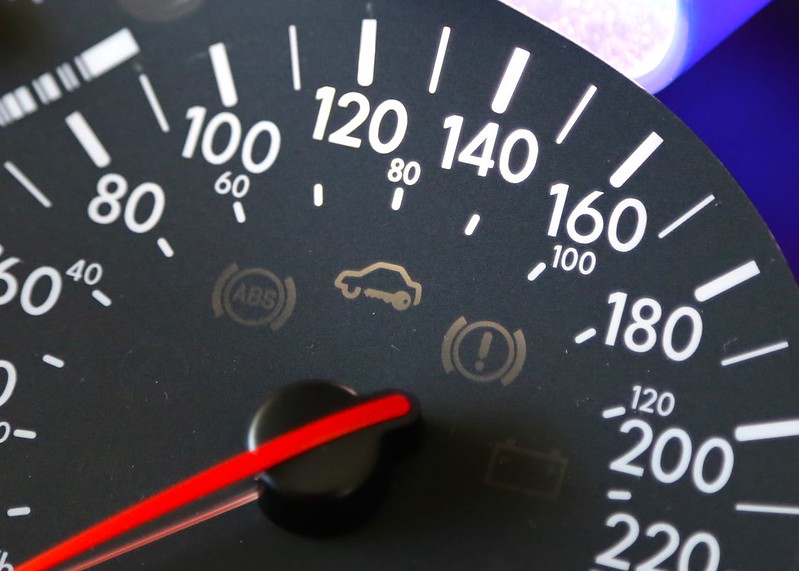
And, where the EV has this...
Eurovan: 6 warning lights in "centre"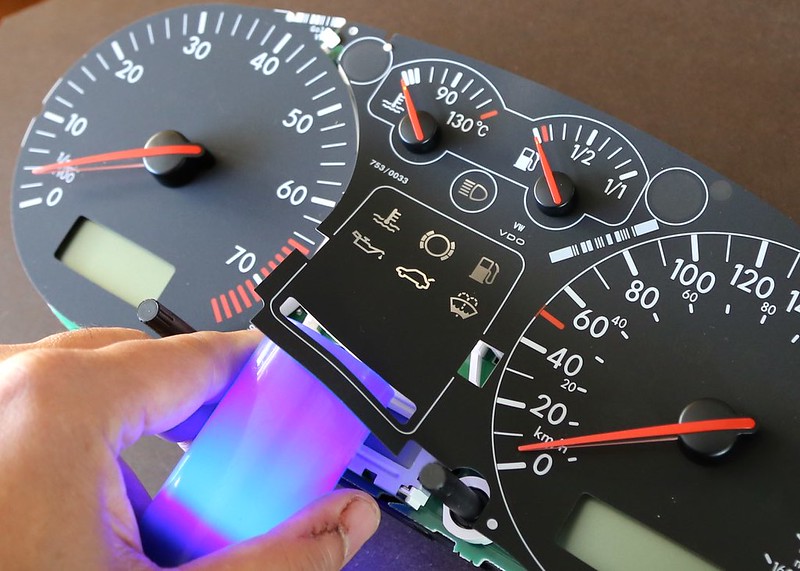
The MK4 has this...
Mk4: 8 warning lights in "centre"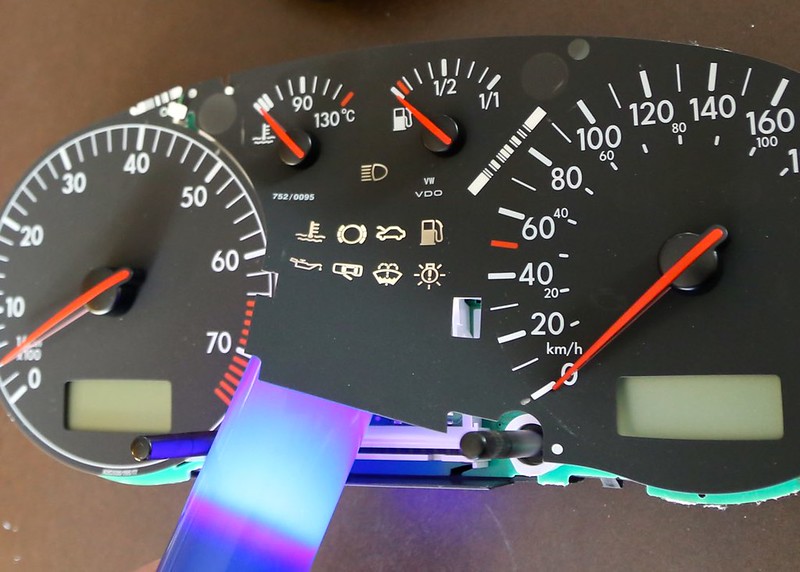
The extras here being "door open", "hood open" and "bulb out indicator" .
Guess we'll have to wait and see if these will stay out if I install it in the van.

And finally... swap the front fascia and snap it back together....
Manual cluster for EV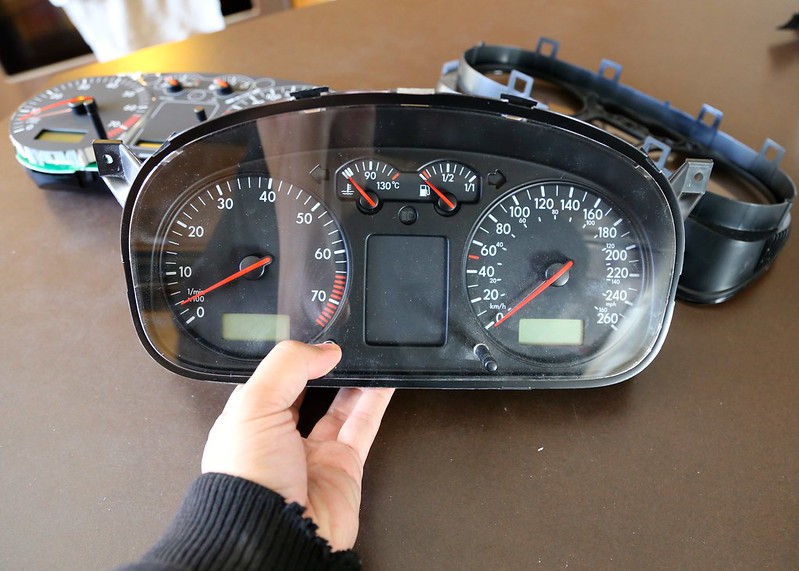
EDIT -- I just noticed that on the new assembly -- that the control knobs are longer on the MK4 cluster and so stick out even further (+ 8-10mm) on the EV fascia. Certainly something that can be easily swapped as well.