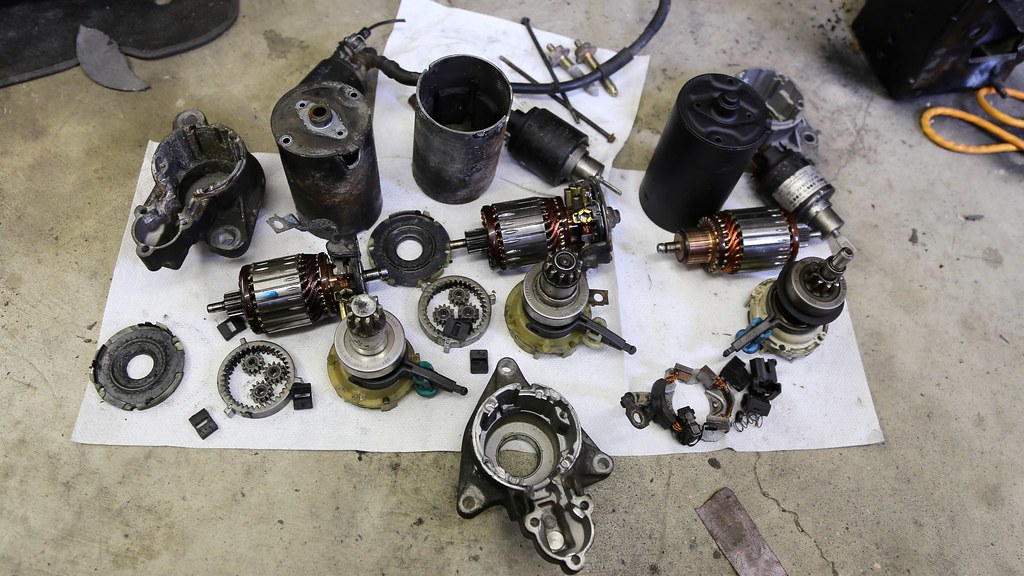
 L-R: 02J starter parts, 02G starter parts, 01P starter parts. The key part in this picture is the 02G starter mounting bracket -- shown centre bottom
So the next step is to take it all apart. Now I had already disassembled Lucille's' starter - before watching the Westronics video (that I posted a link to in a previous post) -- and so I pulled the brush holder off of the commutator before realizing what a pain in the arse it is to put them back in. Each brush is held in place by a spring that keeps it tensioned to the commutator -- so it can be tricky to reassemble. Knowing that (and having watched the Westronics vid) -- I knew better the second and third time around to leave the brush box on!

The big pain with taking these apart is the starter solenoid bolts -- some were held with red thread locker. Both the 125 series starter used a phillips head, and I stripped all of them and ended up having to extract/drill them all out. :mad: The single 110 series (from Lucille's 01P) used torx t-20/25 -- and came out just fine.
Although the brush boxes are compatible from the 110 and 125 series of starters -- the armatures are different. The 110 series is longer - longer armature, longer case. So really the only parts in play from the 01P starter are the brushes, and the case cap (w/bushing). The brushes from the 01P were actually in very good shape (almost new) - which makes me think Lucille may have had her starter rebuilt -- although the
genuine-bosch parts sticker on the solenoid is also a clue.
 01P Starter Brushes
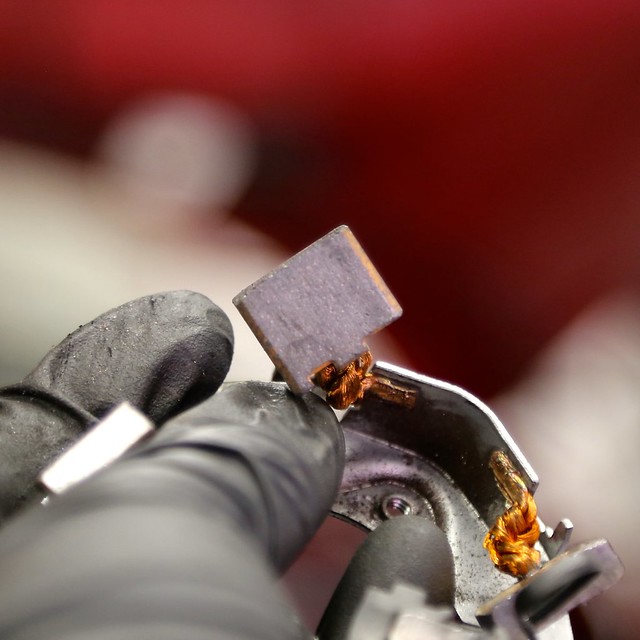 Brushes are loose, but in excellent shape - probably within 80-90% of new size.
02G Starter Brushes Brushes need replacement. 3 brushes with 50% left, one with less than 25%.
 Notice, gap in brush holder showing spring.
02J Starter Brushes 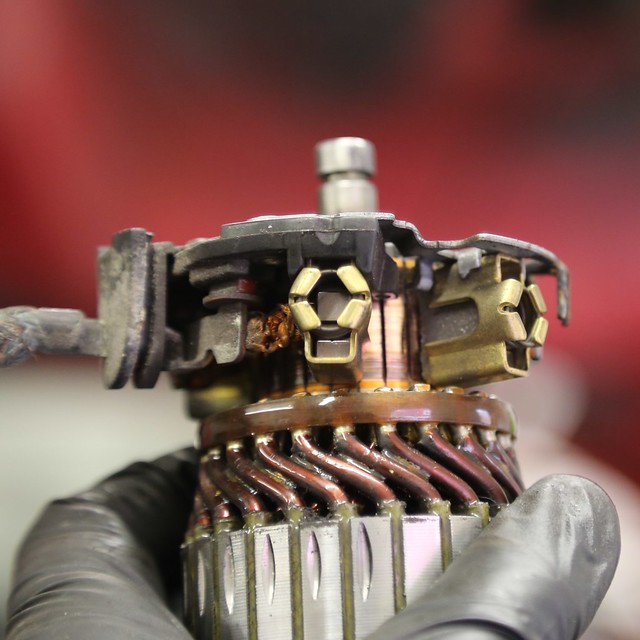 Brushes are very good shape - perhaps 75% of new. Springs are tight - noticeably much less brush wear than the other 02G.
And this is main reason I went the junk yard - to retrieve this starter drive pinion - used on manual 12v VR6s (which use a 228m clutch on a SMF). This is 9mm longer than the drive pinion on the 02G.
02J Starter Drive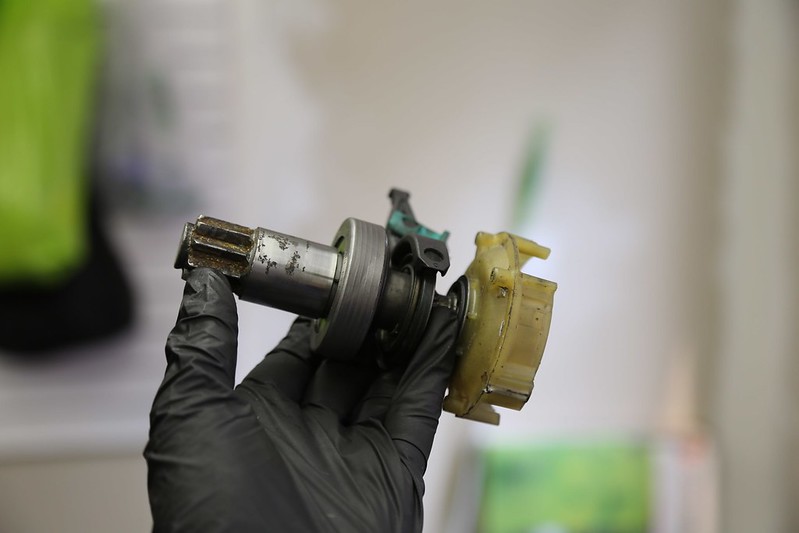 Bosch PN# 1-006-209-643
Specs: 9-T, CCW, 16-SPL, 11mm ID, 25.7mm Gear OD, 90mm L
Note, that it seems entirely possible to pull these drives ends off of the helical shaft (which is not a part of the drive assembly). The end of the drive shaft has a removable cap, under which a retaining clip holds the drive onto the helical shaft. It's a little more work that I need to do -- I can leave it together and swap all the parts as I am going from like starter models (125 to 125 series). If somebody were going from the 110 series to the 125, then I would need to pull the drive off as the armatures' drive pinion and its subsequent gearing are different between these two series of starters (not to mention that the number of splines on the helical shaft can be different too).
02G Starter Drive Bosch PN# 1-006-209-648
Specs: 10-T, CCW, 16-SPL, 11mm ID, 28mm Gear OD, 81mm L
With that in hand, I cleaned up the other internal components and assembled the rest with the pick of the litter between like components. The starter housing/case was sanded down and painted. One worthy note on this is that both the 125 starter housing had a lot of buildup and corrosion on the inside. There is a small opening along the top -- opposite to where the brush holder wiring exits -- that allows crud and moisture into the housing. So, I will need to future proof this with some sort of plug.
125 Series Starter interior corrosion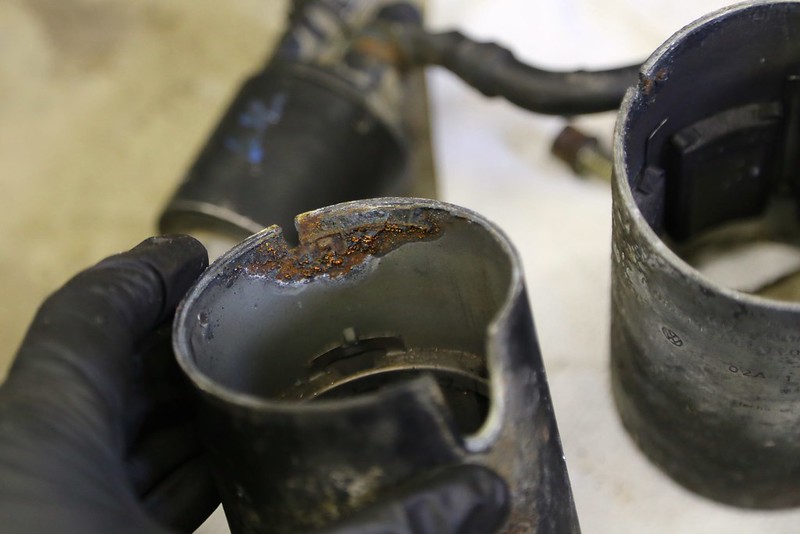
EDIT: Incorrectly listed junkyard starter as from an 02M -- should be an 02J transmission.